To add a descendant, you must have adequate permissions for accessing the parent document. You can add the same document to a virtual document more than once.
To add a descendant to a virtual document:
Do one of these:
To select the descendant now, navigate to the descendant, and add it to your clipboard.
To select the descendant later or to create a new file as the descendant, skip this step. You will select the descendant later in this procedure.
Navigate to the parent document, and view its structure. For instructions on viewing the structure, see View the structure of a virtual document.
Do one of these:
To use a descendant from your clipboard, select Tools > Virtual Document > Add Child > From Clipboard, then select the descendant, and then click OK.
To navigate to the descendant in the repository, select Tools > Virtual Document > Add Child > From File Selector, select the descendant, and click OK. For detailed steps see Locate an item in a selection dialog box.
To create a new file to be used as the descendant, select Tools > Virtual Document > Add Child > Using New Document.
If the parent document is not already checked out to your computer, Webtop checks it out. If the intended parent is not a virtual document, the system automatically converts the document to a virtual document.
If you chose to create a new file to be used as the descendant, then create the new file by using the standard procedure for creating a new file. Otherwise, skip this step.
Check in the parent document as follows:
Select the parent document.
Select Tools > Virtual Document > Save Changes.
Click OK.
Select checkin options, and click OK.
The new descendant is added as the last descendant in the parent document.
To add descendants by drag-and-drop:
Navigate to the parent document, and view its structure in the navigation pane.
In either the content pane or a new window, navigate to the files to add as descendants.
Note: To open a new window, select Tools > New Window.
Drag-and-drop the files from Step 2 to the appropriate location in the parent, dropping the files by positioning your mouse pointer either high, low, or midway on an existing descendant, as described in Table 12.1.
A shortcut menu appears.
In the shortcut menu, select Add here.
The file is added to the parent document. If you did not select a specific location within the descendants, the file is added as the last descendant in the document. If the intended parent is not a virtual document, the system automatically converts the document to a virtual document.
If the parent document is not already checked out to your computer, Webtop checks it out.
Check in the parent document as follows:
Select the parent document.
Select Tools > Virtual Document > Save Changes.
Click OK.
Select checkin options, and click OK.
Table 12.1. Position of your mouse pointer when you use drag-and-drop in a virtual document
| Mouse pointer | Result |
|---|---|
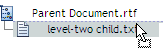
Position the mouse pointer high on the target file, as shown here.
| The added files become the descendants that come before the target file in the order of descendants. |
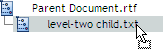
Position the mouse pointer midway on the target file, as shown here.
| The added files become descendants of the target file. If the target file is a simple document, Webtop converts it to a virtual document. |
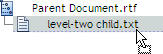
Position the mouse pointer low on the target, as shown here.
| The added files become the descendants that come after the target file in the order of descendants. |